
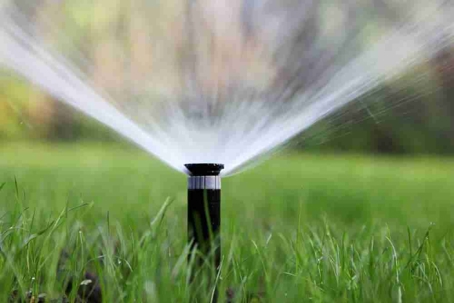
How to Cap a Sprinkler Head
Capping a sprinkler head can be a straightforward process when you have the right tools and knowledge. Whether you’re looking to save water, fix leaks, or adjust your irrigation zones, knowing how to cap a sprinkler head can prevent unnecessary water waste and maintain the integrity of your irrigation system.
There are various reasons one might need to cap a sprinkler head. For instance, if you’re landscaping and no longer need irrigation in a particular area, capping is a practical solution. Additionally, if a sprinkler head is damaged or leaks, temporarily capping it can prevent further issues while you get the appropriate replacement parts.
Capping a sprinkler head can also be essential during winterization, particularly in colder climates where pipes are at risk of freezing. Understanding the process and implementing it correctly ensures that your sprinkler system operates effectively and avoids potential damage.
Preparing to Cap Your Sprinkler Head
To effectively cap a sprinkler head, you’ll need to identify the need for capping and gather the appropriate tools and materials. This will ensure that the task is completed efficiently and without complications.
Step #1 Identifying the Need
Identifying the need to cap a sprinkler head is the first step. It is essential to determine whether the sprinkler head is damaged, not needed, or if the irrigation system is being modified.
For instance, if a sprinkler head is leaking or broken, capping it might be a temporary solution. It may be that the irrigation layout is changing and certain areas no longer require watering.
Look carefully at the current irrigation setup. Determine which heads are redundant or malfunctioning. Be aware of typical signs such as pooled water or erratic spray patterns, which may indicate a damaged head.
By identifying the precise need, you can ensure that capping is indeed the appropriate action to take.
Step #2 Gathering Tools and Materials
Before starting the process, gather all necessary tools and materials to cap off the sprinkler head efficiently. The tools typically required include a wrench or pliers for removing the sprinkler head and a small garden trowel or shovel for digging around the head.
Tools:
- Wrench
- Pliers
- Garden trowel or shovel
For materials, a PVC cap or a sprinkler head cap is essential. Also, having Teflon tape is crucial to seal the threads and prevent leaks.
Materials:
- PVC cap or sprinkler head cap
- Teflon tape
Using the right tools will make the job easier and ensure a secure fit for the cap. Having these prepared beforehand streamlines the process and avoids unnecessary interruptions.
Make sure all tools and materials are in good condition. This ensures that the task can be completed smoothly and successfully.
How to Cap a Sprinkler Head: the Capping Process
Capping a sprinkler head involves turning off the water supply, removing the existing sprinkler head, installing the cap, and testing the sprinkler system to ensure everything is correctly sealed.
Step #3 Turning Off the Water Supply
Before starting any work, turn off the water supply to the sprinkler system. Locate the main valve and turn it clockwise to shut it off. This step is crucial to prevent water from leaking or spraying while performing the next steps.
It helps to relieve the pressure in the system by running one or two sprinkler heads briefly after shutting off the water. This ensures that no water remains in the pipes that could interfere with the process.
Step #4 Removing the Existing Sprinkler Head
Use a small shovel to dig around the sprinkler head you want to cap. Digging about 5-6 inches deep should suffice to expose the riser or the point where the sprinkler head connects to the lateral pipe. Carefully remove the dirt and set it aside for refilling the hole later.
Once the sprinkler head is exposed, unscrew it from the riser. A pair of pliers might be helpful if the head is resistant. Ensure that you remove the head and any other components attached to it, leaving only the exposed pipe.
Step #5 Installing the Cap
Select an appropriate end cap that matches the threading of your riser. Thread the cap onto the exposed riser, turning it clockwise until it is snug. Some caps come equipped with rubber washers to create a watertight seal.
If the cap does not have a rubber washer, use plumber’s tape on the threads of the riser before attaching the cap. This ensures no water can leak from the sealed end. Make sure the cap is tightly secured to prevent any future leaks.
Step #6 Testing the Sprinkler System
After installing the cap, it is important to test the system to ensure everything is properly sealed. Turn the water supply back on and activate the sprinkler system. Observe the capped area closely for any signs of leakage.
Run the system for a few minutes to confirm that the cap holds under normal operating pressure. If there are no leaks, the process is complete. Refill the hole around the capped riser with the previously set aside dirt, ensuring the area is neatly restored.

Post-Capping Considerations
Capping a sprinkler head requires careful attention to avoid common mistakes and ensure ongoing maintenance. Addressing these areas will help maintain a healthy and efficient irrigation system.
Avoiding Common Pitfalls
Incorrect Cap Sizing: One of the most common mistakes is using a cap that does not fit properly. Always ensure the cap matches the thread size of the pipe to prevent leaks.
Not Clearing the Pipe: Failing to remove debris can block the pipe, causing future issues. Make sure the pipe is clean before placing the cap to avoid clogging.
Partial Sealing: Ensure the cap is fully secured to prevent water leakage. Double-check the installation to confirm that all fittings are tight and there are no gaps.
Overlooking Water Flow: Redirecting water flow incorrectly can lead to pressure issues. Properly plan and modify the irrigation zones to account for capped heads to maintain optimal system performance.
Ongoing Maintenance
Regular Inspections: Periodically check the capped areas for leaks or wear. Make it a routine to inspect your irrigation system each season to catch and fix any potential issues early.
Check for Pressure Balance: After capping, continuously monitor the water pressure throughout the system. Changes in pressure may indicate a hidden leak or an imbalance that needs addressing.
Maintain Cleanliness: Keep the capped area free from dirt and debris. This practice helps prevent blockages and ensures the system remains efficient.
Use Quality Materials: Opt for durable, high-quality caps and plugs. Investing in reliable materials reduces the need for frequent replacements and keeps the system functioning smoothly over time.
Regularly update your irrigation system’s layout to reflect changes and improvements, ensuring accurate and efficient water distribution across your landscape.
Contact J Bell Services for Help With Your Sprinkler
Understanding your sprinkler system’s needs is crucial. Regular maintenance and inspection are key to keeping your sprinkler system in good condition. Simple steps, when done regularly, can prevent bigger issues down the line.
Capping a sprinkler head can be a cost-effective way to manage your irrigation system efficiently. It conserves water and saves money. Some aspects of sprinkler maintenance can be handled in a DIY manner, but others require professional assistance from a sprinkler repair service. For those not comfortable with DIY tasks, our professionals provide expert care and reliability. We ensure the job is done correctly with minimal hassle. This option provides peace of mind and long-term benefits, especially if you need to actually replace your sprinkler head instead of just cap it.
Contact J Bell Services and let us know what issues you’re experiencing, and we’ll tell you how we can help.