
How to Clean Sprinkler Heads
How to Clean Sprinkler Heads
Knowing how to maintain sprinkler heads is essential for a well-functioning irrigation system. When debris or dirt clogs the heads, water distribution becomes inefficient, leading to dry patches and wasted water. Cleaning your sprinkler heads ensures optimal performance and longevity of your irrigation system.
Ignoring the upkeep of your sprinkler heads can result in more significant issues down the line. Regular maintenance not only prevents blockages but also helps in identifying any damage or wear that might need attention. An investment of a little time in cleaning can save both water and repair costs.
Properly functioning sprinkler heads also contribute to the health and appearance of your lawn or garden. Efficient water distribution supports even growth and avoids overwatering certain areas. Cleaner sprinkler heads mean a more beautiful and sustainable outdoor space.
Identifying When to Clean
Regular maintenance of sprinkler heads ensures efficient operation and water distribution. Spotting dirty sprinkler heads early can prevent issues and save on costly repairs.
Recognizing Signs of Dirty Sprinkler Heads
Dirty or clogged sprinkler heads often show reduced water output or an uneven spray pattern. Visible debris, like dirt or grass, can also indicate the need for cleaning.
Another sign is patches of dry or over-watered grass, showing water isn’t reaching all areas evenly. A decrease in system water pressure might also hint at clogged heads. Regularly checking for these signs helps maintain optimal performance.
Preparation for Cleaning
Before cleaning your sprinkler heads, you need to ensure you have all the necessary tools and materials. This preparation step will save time and help you complete the task efficiently and effectively.
Gathering Necessary Tools and Materials
To clean sprinkler heads properly, gather the following items:
- Screwdriver – For removing and reinstalling sprinkler heads.
- Needle-nose pliers – Useful for extracting debris stuck in small openings.
- Bucket of water – For rinsing parts and cleaning residue.
- Soft brush or toothbrush – Ideal for scrubbing away dirt and grime.
- Toothpicks or small wire – To unclog nozzles and tiny holes.
Additionally, having work gloves will protect your hands during the process, and a towel can keep you dry and assist with cleanup. Make sure these items are easily accessible before starting the cleaning task.
The Cleaning Process
To ensure your sprinkler system functions efficiently, it’s crucial to follow a series of steps. These steps include turning off the water supply, removing and cleaning components, and then reassembling and testing the system.
Turning Off Water Supply
To begin, locate your sprinkler system’s main water valve. It’s typically found near your water meter or main water line. Turn this valve clockwise to stop the water flow. This step is essential to prevent water from spraying uncontrollably while you work on the sprinkler heads.
Make sure to double-check that the water is completely off before proceeding. A quick test can be done by manually attempting to run one of the zones for a few seconds. If no water comes out, you’re ready for the next step.
Removing the Sprinkler Head
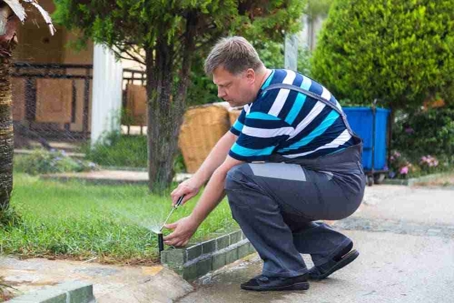
Using a small shovel or spade, carefully dig around the sprinkler head to expose its base. Be cautious not to damage the connecting pipes. Once exposed, grip the riser and unscrew the head counterclockwise.
If it’s stubborn, you can use a pipe wrench. Place any removed parts aside in a safe area to avoid misplacing them.
Cleaning the Nozzle and Filter
To remove debris from sprinkler heads, begin with the nozzle. Use a soft brush or an old toothbrush to scrub away any debris. For stubborn blockages, a thin pin or wire can help to clear the small holes in the nozzle. Carefully remove the filter, typically situated inside the sprinkler head or below the nozzle.
Run the filter under tap water to wash away dirt and sediment. If necessary, soak it in a mild soap solution for a deeper clean.
 789-5557-scaled.jpg "Man in a Reflective Jacket")
Reassembling the Sprinkler Head
Reattach the cleaned filter and nozzle back onto the sprinkler head. Carefully screw the sprinkler head back onto the riser, making sure it’s aligned properly. Tighten it snugly to avoid any leaks but be cautious not to over-tighten, as this may cause damage.
Fill in the dirt around the base, ensuring that the sprinkler head is level with the ground. This step is crucial to ensure even water distribution across your lawn.
Testing the Sprinkler System
Turn the main water valve back on by turning it counterclockwise. Once the water supply is restored, manually activate the zone you’ve serviced. Observe the sprinkler head to ensure it’s operating correctly. Look for any leaks, uneven spray patterns, or blockages.
Adjust the nozzle angle if needed. Repeat the process for any other sprinkler heads that require maintenance.
Maintenance and Troubleshooting
Proper care and timely fixes can keep your sprinkler system running smoothly. Learn how routine checks can prevent problems and how to handle common issues like leaks and clogs.
Routine Maintenance Tips
Inspect the sprinkler heads regularly to ensure they are free of debris. Use a soft cloth or a small brush for cleaning. Dirt and grass clippings can block the nozzles, reducing water efficiency.
Check the alignment and adjust it. Misaligned heads often miss their intended areas, wasting water and causing dry spots. Adjust the direction and spray pattern as needed.
Monitor water pressure. Incorrect water pressure may lead to poor performance. A pressure gauge can help in ensuring that the system operates within the recommended range.
Replace worn-out parts promptly. Over time, seals and nozzles can wear out, causing leaks. If a head is leaking when it’s turned off, it likely needs a new seal or you need to replace it.
Test the system periodically during the irrigation season. Run the system and observe the spray patterns and coverage to detect any deviations or malfunctions early.
Troubleshooting Common Issues
If the sprinkler head is not popping up, check for dirt or grass encasing it. Clean around the head and gently lift it.
For inconsistent spray patterns, ensure that the nozzle isn’t clogged. Remove the nozzle and clean it with water or a toothpick.
If it’s leaking when it’s turned off, a damaged valve or seal is usually the issue. Inspect the seals and valves and replace them if necessary.
Low water pressure might indicate a leak somewhere in the system. Walk along the water lines to identify wet spots or puddles, then repair the leaks accordingly.
Should you need to replace a sprinkler head, ensure compatibility with your existing system. Measure the current head and buy the exact model for hassle-free installation.
For heads that need realignment, gently rotate the head to direct the water spray to the desired area. Ensure that all connections are tight to avoid leakage.
For help with any and all of this, contact J Bell Services. Our company specializes in all types of sprinkler services, including maintenance, cleaning sprinkler system heads, and repairs.