
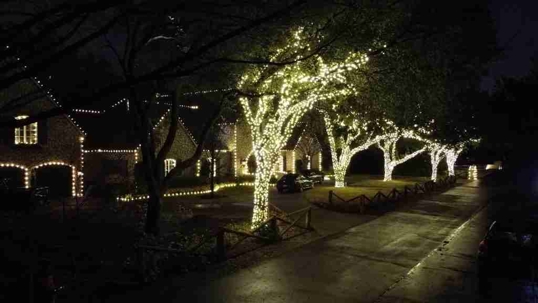
How to Hang Christmas Lights Outside
How to Hang Christmas Lights Outside:
Getting your outdoor space ready for the holidays can be straightforward and enjoyable with the right approach. To hang Christmas lights outside safely, always plug them into a GFCI-protected outlet to prevent shock due to moisture and short circuits. Having the correct tools and following a clear plan can save you time and frustration.
For those looking to achieve a professional look, consider J Bell Services. The benefits of professional holiday lighting include ensuring the lights are evenly spaced, securely attached, and designed to meet your specific aesthetic preferences. This can save you from potential hazards and give you more time to enjoy the festive season.
Planning Your Outdoor Christmas Lights
Selecting the Right Lights
Selecting the right type of lights is crucial for a successful display. LED Christmas lights are popular because they use less energy and last longer than incandescent bulbs. Look for lights that are rated for outdoor use to ensure they can withstand the elements.
Another option is solar-powered lights, which harness sunlight during the day and light up at night. These are environmentally friendly and reduce electricity costs. Choose lights with different colors or effects to enhance your decoration.
Light clips can help you anchor lights securely to various surfaces without causing damage. Clips are available for shingles, gutters, and other parts of the house.
Measuring and Mapping Out Your Design
Before hanging or purchasing holiday lights, measure the areas where you plan to hang them. Start by measuring the roofline, windows, doors, and other features you want to decorate. Use a tape measure to get accurate dimensions.
Creating a diagram can help visualize the layout and ensure you have enough lights. Divide the total distance by the length of each light strand to calculate how many strands you need. Consider adding extra for trees, bushes, or special displays to account for any unexpected needs.
Marking the locations of each clip and hanging point on your diagram can make installation smoother.
Considerations for Energy Efficiency
Energy efficiency is a key consideration in outdoor Christmas lights installation. As mentioned, LED lights are highly efficient, consuming up to 80% less energy than traditional incandescent bulbs. This helps lower electricity bills and reduces your carbon footprint.
Consider using an automatic timer to turn the lights on and off at set times. Timers prevent wasted energy by ensuring lights are only on when needed. Another option is connecting lights to a GFCI-protected outlet to enhance safety and prevent electrical hazards.
By planning carefully, you can create a beautiful and efficient holiday light display that brings joy without unnecessary energy costs.
Materials and Tools Needed
Understanding Lights and Hardware
Choosing the right type of lights is crucial. Options include LED and incandescent lights. LED lights are energy-efficient and durable, while incandescent lights provide a classic warm glow but consume more energy. Consider the length and number of strands based on your measurements.
For mounting, avoid nails to prevent damage. Light clips are ideal for securing lights to gutters, shingles, and window frames. For more challenging surfaces like hanging Christmas lights on stucco, use specialized hooks. These won’t damage the surface and ensure a secure hold.
Net lights and icicle lights are excellent for covering larger areas like bushes and eaves. Make an installation diagram to calculate the materials needed, ensuring an efficient setup.
Ensuring Electrical Safety
Electrical safety cannot be compromised. Always use outdoor-rated extension cords and plug them into a GFCI-protected outlet. This protects against electrical shock due to moisture. Ensure the outlet is controlled by an on/off switch, timer, or app for convenience and safety.
Inspect all light strands for frayed wires and broken sockets before use. Use electrical tape to secure connections and prevent moisture infiltration. If hanging lights on metallic surfaces or near water sources, take extra precautions to insulate and waterproof all electrical connections.
Step-by-Step Hanging Guide
Preparing Your Workspace
Before starting, gather all necessary materials such as light strands, hooks, clips, and a ladder. It’s highly recommended to test each light strand before installation to confirm they are working correctly.
Ensure the area is free of obstacles and ice. Working in daylight provides better visibility. For safety, opt for a sturdy, extendable ladder and work gloves to handle the lights securely.
Installing Hooks and Clips
Begin by determining where the lights will be installed. Measure these areas to estimate how many light strands and securing accessories you’ll need. Use hooks and clips specifically designed for outdoor use.
Clips for gutters and shingles are ideal for rooflines. For windows, adhesive hooks or clips are recommended to avoid damaging the frames. Securing points should be evenly spaced to prevent sagging.
Hanging Lights on Rooflines, Windows, and Lawns
When hanging lights on rooflines, start from the top and work your way down. Use a pole to assist in placing lights in hard-to-reach areas. If wrapping trees and bushes, start from the trunk and move outward.
For hanging Christmas lights around windows, begin at one corner and work your way around, securing the lights with clips. On lawns, stake lights firmly into the ground to ensure they remain upright and visible.
Testing and Troubleshooting
Once all lights are secure, plug them in to check for functionality. Look for any sections that fail to light up and troubleshoot by checking the bulbs and connections. Ensure all connections are well-covered and protected from moisture.
If a problem persists, it may be necessary to replace faulty sections or consult a professional for assistance. Keep replacement bulbs and fuses on hand for quick fixes.
Christmas Lighting Tips for Safety
Electrical Safety
One crucial aspect is choosing the right lights rated for outdoor use. Always plug lights into a GFCI-protected outlet to prevent shock from moisture and other common causes of short circuits. Use outdoor-rated extension cords and avoid overloading electrical outlets by respecting the wattage limits of your light strands.
Opt for LED lights over incandescent ones, as they are more energy-efficient and operate at cooler temperatures, reducing the risk of fire. Ensure all outdoor lights are in good condition, without frayed wires or cracked bulbs. Consider using plastic light clips instead of nails to secure the lights, minimizing the risk of damaging the wire insulation.
Ladder Safety
Using a sturdy ladder is essential to avoid falls. Select a ladder that reaches the height you need without having to stand on the topmost rung. Always set the ladder on stable, level ground and follow the 3-point contact rule: keep two hands and one foot, or two feet and one hand, in contact with the ladder at all times.
An assistant can hold the base of the ladder for added stability. It’s also wise to inspect the ladder for any defects before use. Avoid overreaching or leaning too far to one side, and make frequent adjustments to the ladder’s position instead. Using the right safety gear like non-slip shoes can also improve grip and stability.
Weather Considerations
Weather plays a significant role in your safety. Avoid hanging lights during wet or windy conditions as this increases the risk of slips and falls. Check the weather forecast and work during a calm, dry day. If it starts to rain or becomes windy while hanging lights, safely discontinue your work and resume when conditions improve.
Cold weather can make wires more brittle and harder to handle. Wear gloves to keep your hands warm and improve your grip.
If this sounds complicated, consider hiring a local Christmas light installation company. If conditions are not ideal or you are uncomfortable working in certain weather conditions, J Bell Services can handle the installation job for you!