
How to Replace Sprinkler Head: A Step-by-Step Guide
How to Replace Sprinkler Head
Replacing a sprinkler head doesn’t have to be a daunting task. With a few straightforward steps, anyone can master this essential garden maintenance skill. Properly functioning sprinkler heads are crucial for ensuring your lawn and garden receive adequate water coverage.
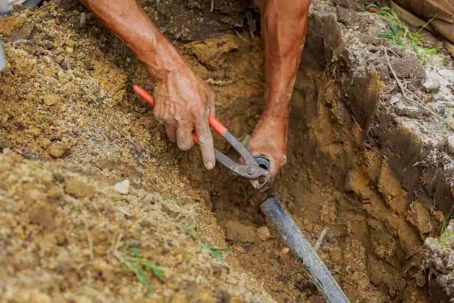
 789-5557-300x199.jpg "Worker Fixing a Sprinkler")
Begin by identifying the faulty sprinkler head and gathering the necessary tools. A shovel, pliers, and a replacement sprinkler head are typically all that’s needed. Make sure to turn off the water supply before starting to avoid a messy situation.
Carefully dig around the malfunctioning sprinkler head, being cautious not to damage any surrounding lines. Once removed, attach the new sprinkler head securely and test the system to ensure it is working properly. This simple process can save time and money, ensuring your lawn stays lush and healthy.
Understanding Sprinkler Systems
Sprinkler systems come in various types, each suited for different irrigation needs. Knowing why a sprinkler head needs replacement helps ensure your system remains efficient.
Types of Sprinkler Heads
There are several types of sprinkler heads, each designed for specific tasks. Rotary heads cover large areas by rotating streams, ideal for lawns. Fixed spray heads emit a constant fan-shaped spray, perfect for garden beds. Bubbler heads release water at a slower rate, suitable for deep watering around trees and shrubs.
Each type has its pros and cons — rotary heads may clog more easily, whereas fixed spray heads can cause water runoff if not properly adjusted. Knowing these details helps in selecting the right sprinkler head for your specific needs.
Common Reasons for Replacement
Sprinkler heads may need replacement due to various issues. Physical damage from lawnmowers or foot traffic is common. Clogging caused by debris can reduce water flow, impacting efficiency. Wear and tear over time can lead to mechanical failure, necessitating replacement to maintain proper irrigation.
Another reason can be changing landscaping needs, requiring different spray patterns or water distribution. Addressing these issues promptly prevents further system problems and ensures your plants receive adequate water.
Preparing for Replacement
Before replacing a sprinkler head, gather all necessary tools and take proper safety precautions to ensure a smooth and secure process.
Gathering Necessary Tools
To replace a sprinkler head, you need a few essential items. A shovel is vital for digging around the sprinkler head, and a utility knife helps cut through any stubborn grass or roots. You should also have a new sprinkler head of the appropriate type and size.
Additionally, a pair of work gloves protects your hands, and a small bucket or container can hold any removed soil. A hose or watering can ensure the area is damp, making excavation easier. Finally, a Teflon tape helps ensure a watertight seal during installation.
Safety Precautions
Safety is paramount in any repair task. Start by turning off the water supply to avoid accidents and water wastage. Ensure you wear protective gloves to prevent any injuries or blisters from handling tools. It’s also wise to check for underground utilities to avoid damaging cables and pipes.
You should work in a well-lit area to ensure clear visibility throughout the task. Keep children and pets away from the working area to maintain a safe environment. If unsure about handling the tools or the sprinkler system, consulting a professional is a prudent step to avoid potential harm or damage with our sprinkler repair services in Dallas.
Replacing the Sprinkler Head
Replacing a sprinkler head involves three main steps: removing the old head, installing the new head, and fine-tuning the spray direction. Precision and care are key.
Removing the Old Sprinkler Head
First, turn off the water supply to prevent accidental spraying. Locate the malfunctioning sprinkler head. Using a shovel, carefully dig around it to expose the riser.
Grip the riser firmly and unscrew the old sprinkler head by turning it counterclockwise. Be cautious not to damage the riser or surrounding pipes. Once removed, check the riser for any debris or damage that might obstruct the new sprinkler head.
Installing the New Sprinkler Head
Before installation, ensure that the new sprinkler head matches the specifications of the old one. Screw the new head onto the riser by turning it clockwise until secure. Hand-tightening is usually sufficient, but ensure there are no leaks.
If necessary, apply plumber’s tape around the riser threads for a tighter seal. Once installed, re-bury the head so it sits flush with the ground surface. This prevents tripping hazards and ensures proper water dispersion.
Fine-Tuning Spray Direction
Turn the water supply back on and test the newly installed sprinkler head. Adjust the spray pattern by following the manufacturer’s directions, usually involving turning a small screw on the top.
Ensure the spray covers the intended area without overwatering any particular spot. Check for any obstructions that might block the water flow. If needed, make minor adjustments to the head or spray angle for optimal coverage.
Post-Replacement Checks
After replacing the sprinkler head, there are vital checks to ensure everything is functioning correctly. These include closely inspecting for any leaks and testing the system to verify proper operation.
Inspecting for Leaks
Once the new sprinkler head is in place, carefully examine the area for leaks. Turn on the system and look for water escaping around the base. Even small leaks can lead to significant water waste or damage over time.
Check the sprinkler head connection to the riser, ensuring a tight fit. If a leak is detected, turn off the water supply immediately and readjust the sprinkler head or replace any faulty components.
A proper seal is crucial for effective operation. Pay attention to any underground piping shifts that may have occurred during the replacement, as these could also cause leaks. Address any damp soil around the sprinkler to avoid larger issues.
Testing the System
Activate the sprinkler system and observe its performance. Ensure the spray pattern is as expected, covering the intended area. Adjust the spray direction and area coverage by turning the nozzle or using manufacturer-specific tools.
Check the water pressure. Low or inconsistent pressure might indicate an underlying problem elsewhere in the system. Compare the new head’s functionality with other heads to ensure uniform performance.
Monitor the sprinkler for a complete cycle, confirming that it operates without any hitches. Make any necessary adjustments to maintain efficiency and uniform water distribution. Regular maintenance checks will help prolong the system’s life and ensure long-term reliability. At J. Bell Services, we can help you replace your sprinkler head if you need help or just don’t want to do it yourself.